Individual Finals
This page is in progress Please check back later for additional changes. |
The Individual and Team Finals, also called Elimination (up to 1/8) and Final (from 1/4 to medals) Rounds, are usually the most important stages in a tournament. Though they can seem hard to be managed at first, once the user gets used to the basic management method, competitions will be much easier to manage and flawless.
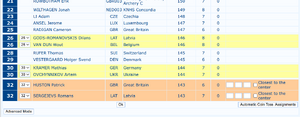
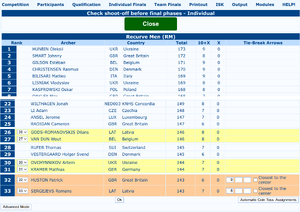
Check and resolve tie scores
Inputting results
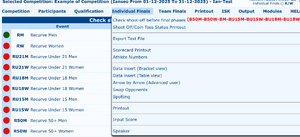
Inputting results of Elimination and Final Rounds is a simple task. In the Individual Finals/Team Finals menu (see Figure 4.8) the software offers the following options.
<placeholder: Figure 4.8: Individual Finals menu>
Scorecard Printout
As per its title, this command enables the user to print Scorecards for the Final Rounds (see Figure 4.9). The software upholds two types of scorecards: Single score with all matches (on the left) and Score for single match (on the right). These two types of scorecards only differ for their convenience. The right templates combine all Elimination and Final Rounds for a single athlete on a single sheet, as the archer will have to keep the scorecard up to the last match shot, the other templates are divided per match, as shown by columns divisions. From the graphic point of view, it is recommended to print a blank scorecard each time, without previous scores from shot Elimination and Final Rounds. It is, then, suggested to avoid using these scorecards, except for tournaments in which electronic scoring devices are in use, or when enough volunteers are available to collect and rearrange scorecards, for the data inputting before proceeding in the tournament might be significantly time consuming. As for the previous printouts pages, the software offers all the needed files, divided by Matches in the first row, Division and Class, in the second row, and for the user selection in the scroll-down window in the lowest part. The user can also print Labels for each single athlete for the Final Rounds, just as for Qualification Rounds. Similarly, in the single scorecard area, the user can print scorecards with all the values from single arrows (available for tournaments in which electronic scoring devices are in use). Scrolling down the page, the software offers other printouts, including blank scorecards without names and, eventually, the chance of printing participants to Elimination and Final Rounds, by choosing to print all the archers, or just the wished athletes.
<placeholder: Figure 4.9: Finals Scorecards Printout page.>
Athlete Numbers
Similarly to the Qualification Rounds, the user can print Athlete Numbers for the Final Rounds (see Figure 4.10).
<placeholder: Figure 4.10: Athlete Numbers Printout for the Final Rounds.>
Data insert (Bracket view)
This is the most efficient way of inputting data for Elimination Rounds. Clicking on this command, the software will open a drop-down menu, from which the user can manage the wished event. After choosing and confirming the selected option, the application will display a bracket template, with the same framework of Elimination and Final Rounds, but with names and boxes for inputting scores (see Figure 4.11).
<placeholder: Figure 4.11: Data insert in Bracket view.>
N.B.
Before choosing any event, the user should select any shot-offs that need breaking from the dropdown menu on the right (Manage Tie-Break), to input any scores from the corresponding shoot-offs.
For inputting scores, both in the Set System and in the Cumulative System, the user has to click on the Enable button on the wished column, to edit the scores fields. In case of Byes, the user has to choose the
option ‘Bye’ in the drop-down menu beside the winner’s name. By default, the program will make the
athlete advance to the following rounds. Should an athlete have no opponents, i@nseo will move the
archer directly to the next round.
In case of tied matches, the user has to input the score of each shoot-off arrow in the last empty box on the left of each row and, then, select ‘Tie Winner’ in the drop-down menu beside the winner’s name. In case of tied scores, usually, a star is added after the score of the shoot-off arrow of the winner athlete (for it is the closest to the face center; see Figure 4.12).
<placeholder: Figure 4.12: Inputting Byes and Shoot-offs scores.>
Data insert (Table view)
Another way of inputting scores during Elimination and Final Rounds is using the Table view. In this case, the page won’t display brackets, but a chart, from which the user can input both scores of single ends, and set/cumulative scores. For a standard tournament, when electronic devices are not in use, the effectiveness of this scoring method is significantly lessened. Plus, in the first top row, the software offers a list of commands to browse the wished round of matches, as the user can move to the Previous Phase or to the Next Phase, view the Brackets up until then, and print the Next Phase Scorecards (even for a single match, obviously), or the Next Phase Names to prepare athletes name stands (see Figure 4.13).
<placeholder: Figure 4.13: Data insert in Table view.>
Spotting
This function is used for the Arrow by Arrow inputting. It enables the user to input the match results live, and, consequently, on sight. This method is meant for national tournaments and international competitions (see Par. 5.9).
Printout
See Par. 4.4.
Speaker
This page enables the announcer to read the general overview of all the running Elimination and Final Rounds, both ended or not, to promptly announce the results to onsite spectators. It is meant for international competitions and national tournaments (see Par. 5.10).
Likewise, the user can also manage Team Matches. The procedure is similar, as it starts by setting the tournament field in the same way of the Individual Finals, opening the command Competition → Team Finals Setup and printing Brackets, Scorecards and Results, using the menu for Team Finals. All the tasks follow the same procedure that has been previously described for the Individual Finals management.
Final Rounds Printout
This menu integrates all Printout commands and templates available in the software. Opening the main page and clicking on Printout, the following commands will be displayed (see Figure 4.14):
<placeholder: Figure 4.14: Printout menu.>
Participant Lists
It enables the user to print all the Participants in the tournament (see Figure 2.40 and Figure 2.41 in Par. 2.4).
Statistics
This command prints all the Statistics about the competition (see Figure 2.37 in Par. 2.4).
Div/Class Result List
From this function, the user can print rankings for Qualification Rounds (see Figure 3.11 in Par. 3.1).
Qualification Round Printout
From this command, the user can print Final Rankings for the tournament to be used in the Elimination and Final Rounds (see Figure 3.12 in Par. 3.1).
Final Rounds
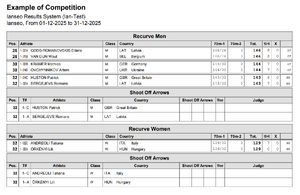
This function prints rankings for the Final Rounds, using both Brackets and Final Rankings templates (see Figure 4.15).
<placeholder: Figure 4.15: Rankings Printout for Final Rounds.>
Header for Result Printouts
It enables the user to input a row, based on the tournament management (e.g. non-official results), on rankings to be printed, simply selecting the Session and entering the wished text in the empty box (see Figure 4.16).
<placeholder: Figure 4.16: Header for Result Printouts page.>
Awards Ceremony Management
From this section, the user can manage the Awards Ceremony for archers in the tournament, choosing the Number of Awarded Athletes for each event, the Name of the Cup and the Awarder. It is mainly meant for Awards Ceremonies of international competitions and national tournaments (see Figure 4.17).
<placeholder: Figure 4.17: Awards Ceremony Management page.>
Awards Printout
This command prints the Awards Ceremony schedule including Athletes, Awards and Awarders entered in the previous section.
Print Sign
From this section, the user can print any Sign (e.g. any direction) needed for correctly directing athletes on the tournament field. Usually, the first row includes any instructions, and the second one should add any directions. Symbols usually typed in the rows are ‘>’ for the Right Turn Indication, ‘<’ for the Left Turn Indication and ∧∧ for the ‘Go Straight’ Indication. These symbols should be entered without adding any other character. Otherwise, the program will add that alphanumeric character in the print (see Figure 4.18).
<placeholder: Figure 4.18: Printed Sign sample.>


